
Cloud technologies is sort of LEGO, I like to build the systems out of these blocks. That is why I decided to start my dev blog in the cloud and first article is about technical aspect of it.
For the blog I decided to use static website hosted on cloud storage with connected CDN. It has a few advantages compared to VPS solutions I used before:
- no need to pay a for VPS and maintain it
- high availability – at least 99.9% for Azure CDN (actual SLA is defined as the lowest from the chained components, and CloudFlare’s free plan doesn’t have an SLA 🙁 )
- low latency – thanks to CDN, the content is cached and served by worldwide CDN network.
- scale up automatically
- low costs
Engine
Choosing the site-generator among popular ones is a tough task. My choice is Jekyll for now. There are plenty of plugins and themes available for it. Maybe later on I will switch over to something else.
Hosting
My hosting solution for the blog is:
- CloudFront for DNS and DDoS protection
- Azure for Storage & CDN
- LetsEncrypt for SSL certificate
SSL
Many tutorials suggest to use Flexible encryption mode, where certificate is served by CloudFlare. I prefer to use my own certificate, and CloudFlare doesn’t allow to bring your own SSL certificate in the free plan.
www or not www
I noticed that many web sites I visit have no www subdomain. The problem is that domain’s root can’t be a CNAME (well, technically can – but may result in unexpected errors). Although CloudFlare has an RFC-compliant solution called CNAME flattening to set up a CNAME for the root domain, but this didn’t work with Azure CDN custom domain verification. So I decided to stick to www and forward traffic from root domain.
Setting up Azure
OK, now lets define the resources we need on Azure side for the blog.
- Storage account – resource holds containers of different kinds (blob, file, etc).
- CDN profile – to deliver the blog to the clients and not overload storage by client requests.
- Endpoint – connected to CDN profile.
- Key Vault – holds SSL certificate, required for HTTPS endpoint.
├── blog_rg               resource group
│   ├── blogabcdef        storage account
│   ├── blogabcdef-cdn    CDN profile
|   ├── blogabcdef        endpoint
│   └── blogabcdef        Key Vault
You can choose any names for the resources, not necessarily the same for all of them. What is important, names for these resources must be globally unique.

Setup steps
For now these steps are described for manual setup, later on it can be automated with ARM.
1. Create an Azure account.
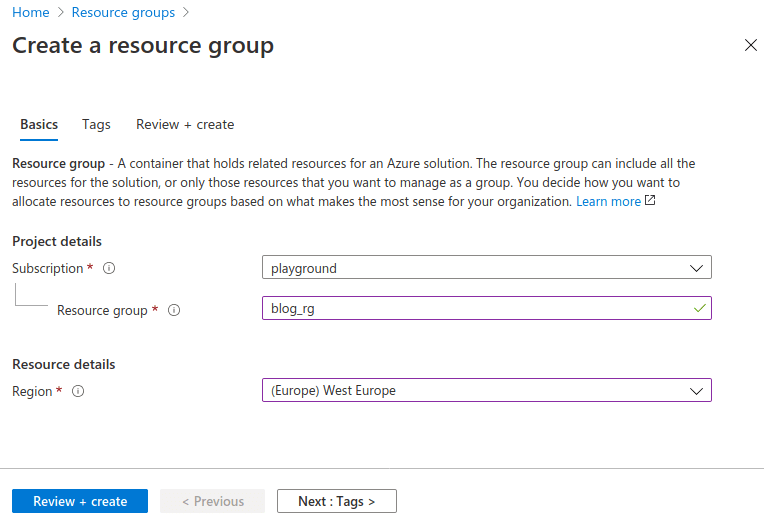
2. Create resource group (I would choose the region where most of the traffic comes from).
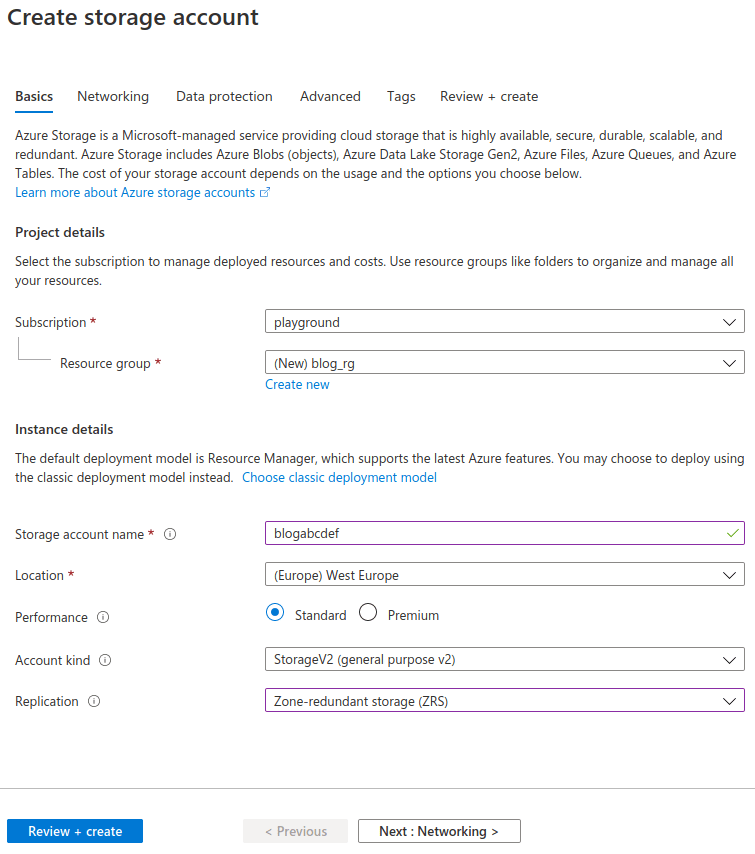
3. Create Blob Storage account.
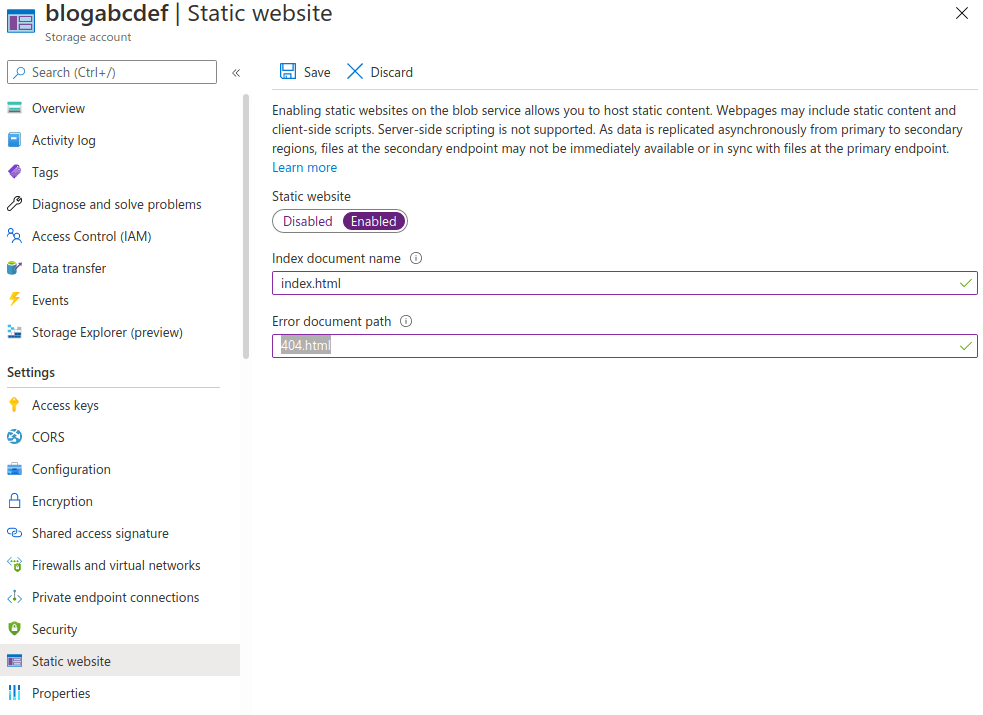
4. Enable static website functionality. This will create container called “$web”, put the names of index and 404 files.
5. Upload site files to the “$web” container.
6. Create CDN pointing to the site URL.
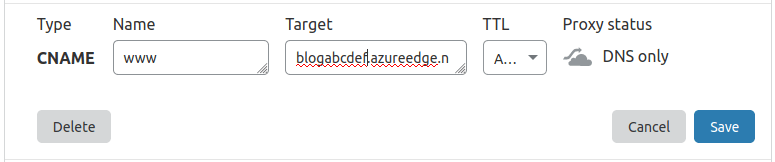
7. Go to CloudFlare and create CNAME record for “www” subdomain pointing to Azure CDN (choose DNS-only, otherwise CNAME verification will fail).
8 Create custom domain name in Azure CDN. Verification should pass.
9. Enable SSL for custom domain in Azure
- Create Key Vault (you can use the same resource group).
- Add “Azure CDN” app to Azure Active directory by running the following command in Azure CLI.
- Add “Access policy” so that Azure CDN can access SSL certificate in the Key Vault. It may take 2 hours before Azure CDN can read cert.
- Generate LetsEncrypt SSL certificate.
- Convert to PFX with openssl tool.
- Upload PFX to Key Vault.
- Enable SSL in custom domain in Azure.
- Choose “own certificate”, your Key Vault, certificate name and its version and press “Save”. Don’t panic if it cannot get an access to the vault – check if you created an access policy and 2 hours passed after Azure CDN is registered in AAD.
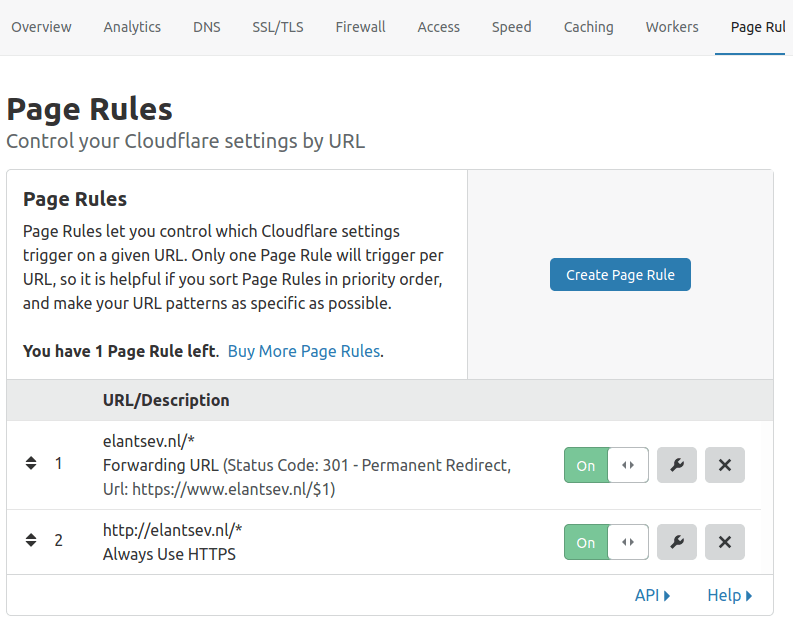
10. Create Page Rules in CloudFlare
Create dummy A record for root domain and make sure its in proxy status, not direct.

Create CNAME record for “www” pointing to Azure’s DNS endpoint.
In “page rules” create 2 rules:
HTTPS only
Forward “example.com/*” to “https://www.example.com”
11. Done
Leave a Reply
You must be logged in to post a comment.